Looking for saree suppliers and manufacturers in India? Skip the IndiaMART rabbit hole. We’ve built and shipped 200+ Shopify stores — here’s our hand-vetted, cluster-by-cluster guide to who supplies what (Surat printed sarees to Banaras handloom), with direct WhatsApp contacts, MOQs, and the operator’s view of where each cluster actually adds value to your inventory.
Verified suppliers we’ve personally worked with
We’ve shipped real orders with the suppliers below. We don’t take commission and we don’t charge them to be listed. Each WhatsApp link is pre-populated — “Hi [Name], Raghoo from GrowwwTech.com recommended you for saree supply…” — so the supplier knows where you came from.
Vasudha Agencies — Surat (synthetic, printed, fancy, festive) MOQ ₹5,000–₹10,000 per order. Low entry barrier — useful for first-time resellers and Instagram boutiques testing inventory. WhatsApp Shiva · WhatsApp Vishnu
Haneef Brothers — Pan Bazar, Secunderabad (Pattu silk, Gadwal, Pochampally, Venkatagiri, Mangalagiri, designer, wedding sarees) MOQ ₹5,000–₹10,000 per order. Multi-cluster catalogue under one roof — handy for testing several Telangana silks in one shipment. Pan India dispatch. 2,000+ wholesale customers (Instagram). WhatsApp Ikran Bhai · Store line
Are you a saree supplier? D2C founders read this guide looking for supply chain. If you’ve been in business 3+ years and want to be listed, WhatsApp us — we vet, no fee.
How big is the Indian saree market, really?
Three numbers you’ll see thrown around: ₹50,000 crore (formal retail), ₹68,000 crore (Surat’s saree-industry output alone), and “₹1 lakh crore+” (the full economy when you add unorganised retail and exports). They all coexist because they measure different stages — what consumers buy formally, what factories produce, and what changes hands across the whole supply chain. The takeaway for sourcing: most popular cluster rankings are off by 10–70× because they confuse these layers. The cluster cards below use verified production-side numbers, sourced cluster-by-cluster.
1. Saree Manufacturers in Surat — India’s Synthetic Capital
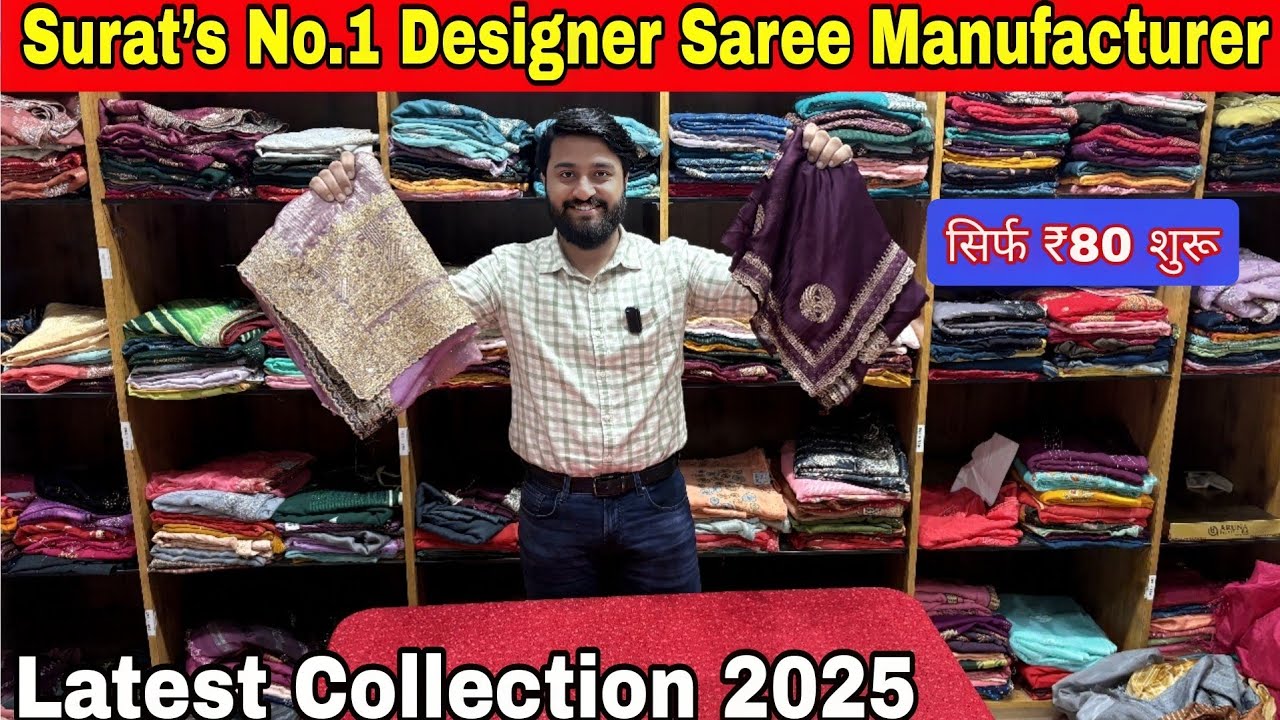
~₹68,000 Cr cluster output · ~₹10,000 Cr saree exports · 10 million sarees/day · 70,000+ traders. Surat owns synthetic — 90% of India’s synthetic fabric and 30% of global fabric production come from this 20-km radius. The new PM MITRA mega park at Vansi (1,142 acres) is targeting ₹10,000 Cr more investment by 2027 (India.gov.in).
Source from Surat if: you sell printed sarees, georgettes, fancy synthetics, festival drops at ₹500–₹3,000 retail. The cheapest quote is almost always a re-seller — pick on response time and consistency, not unit price.
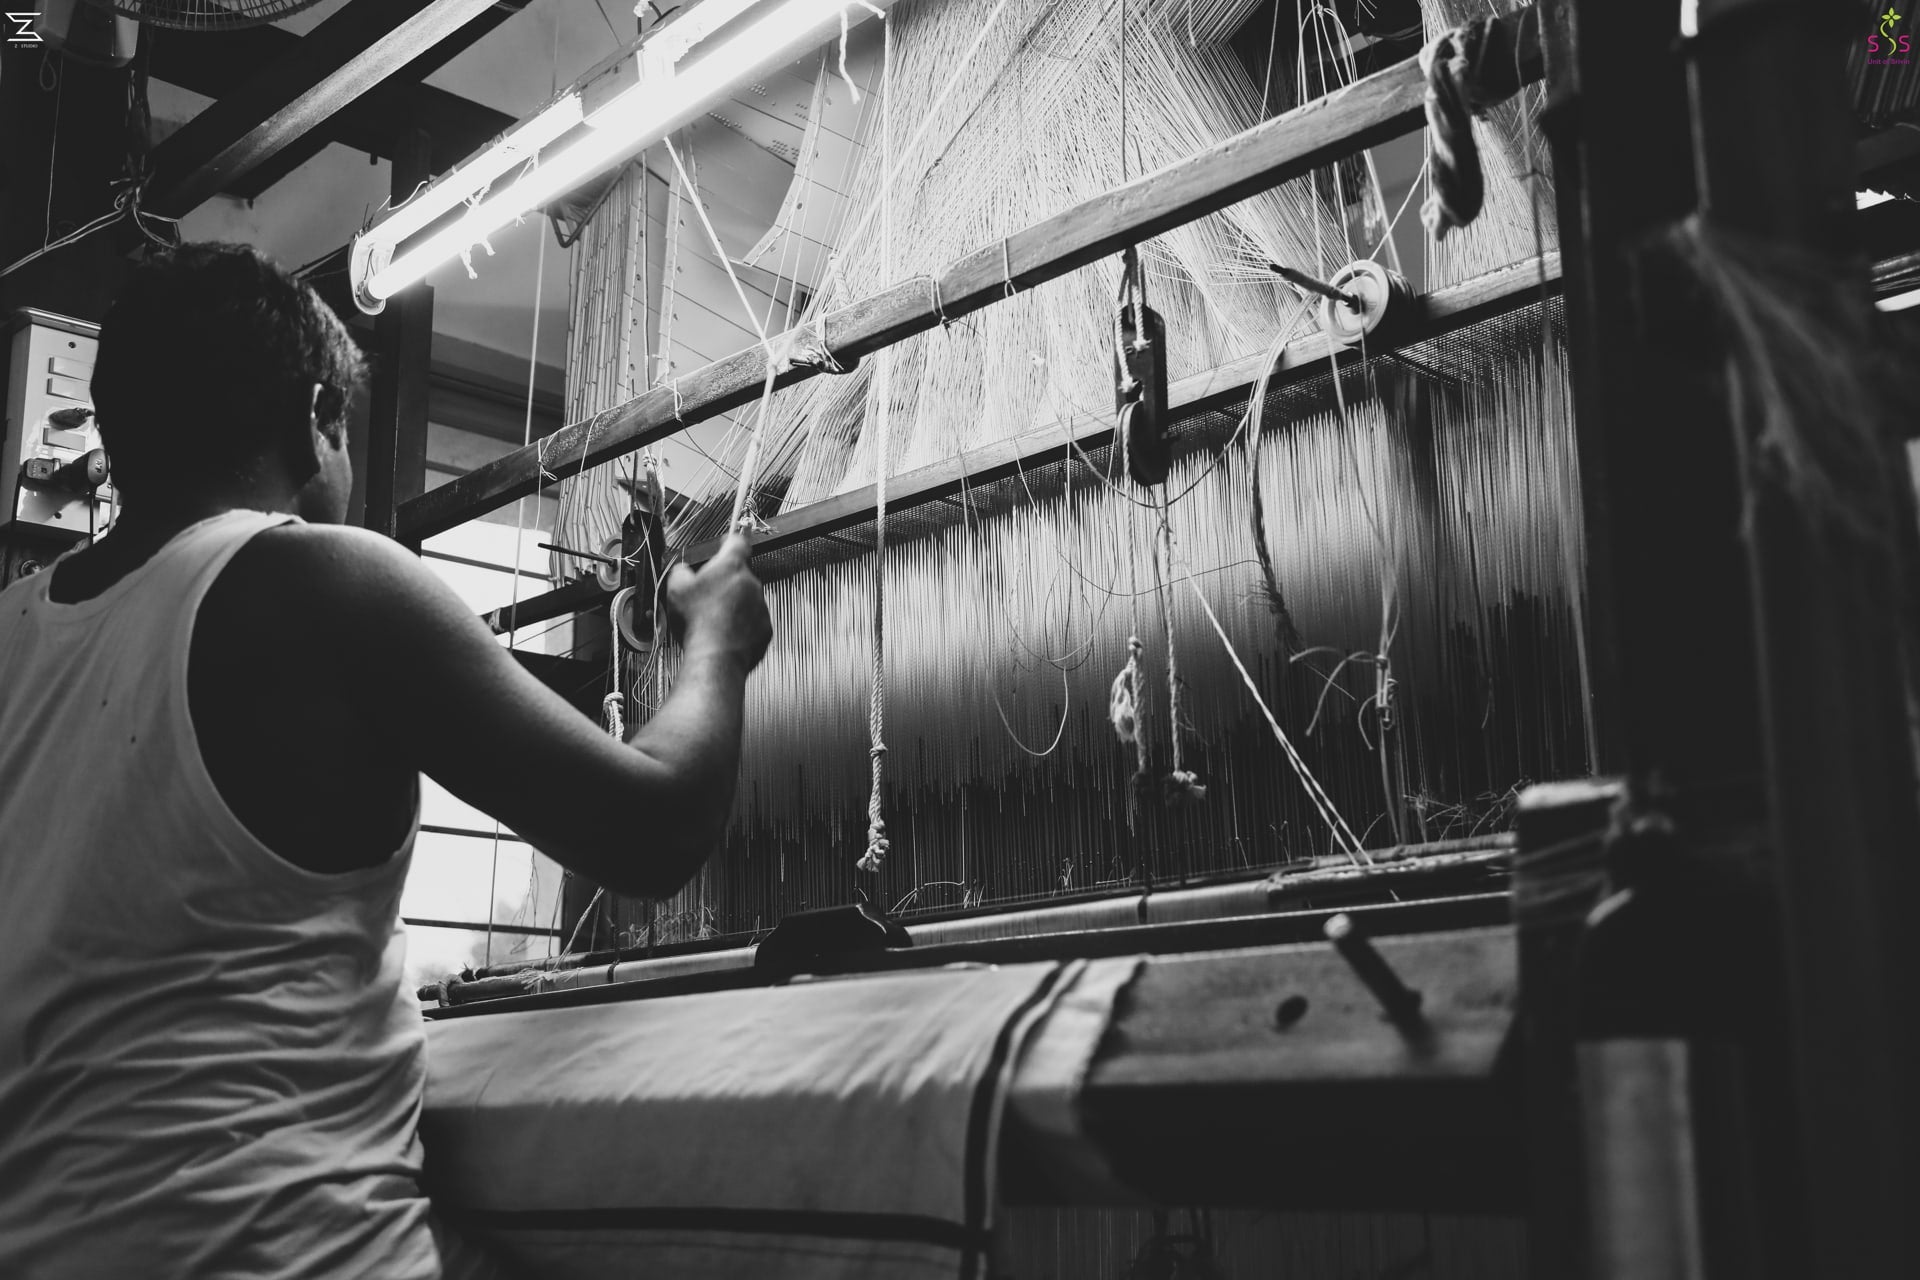
2. Banarasi Saree Wholesalers — The Falling Crown, Still ₹5,000 Cr
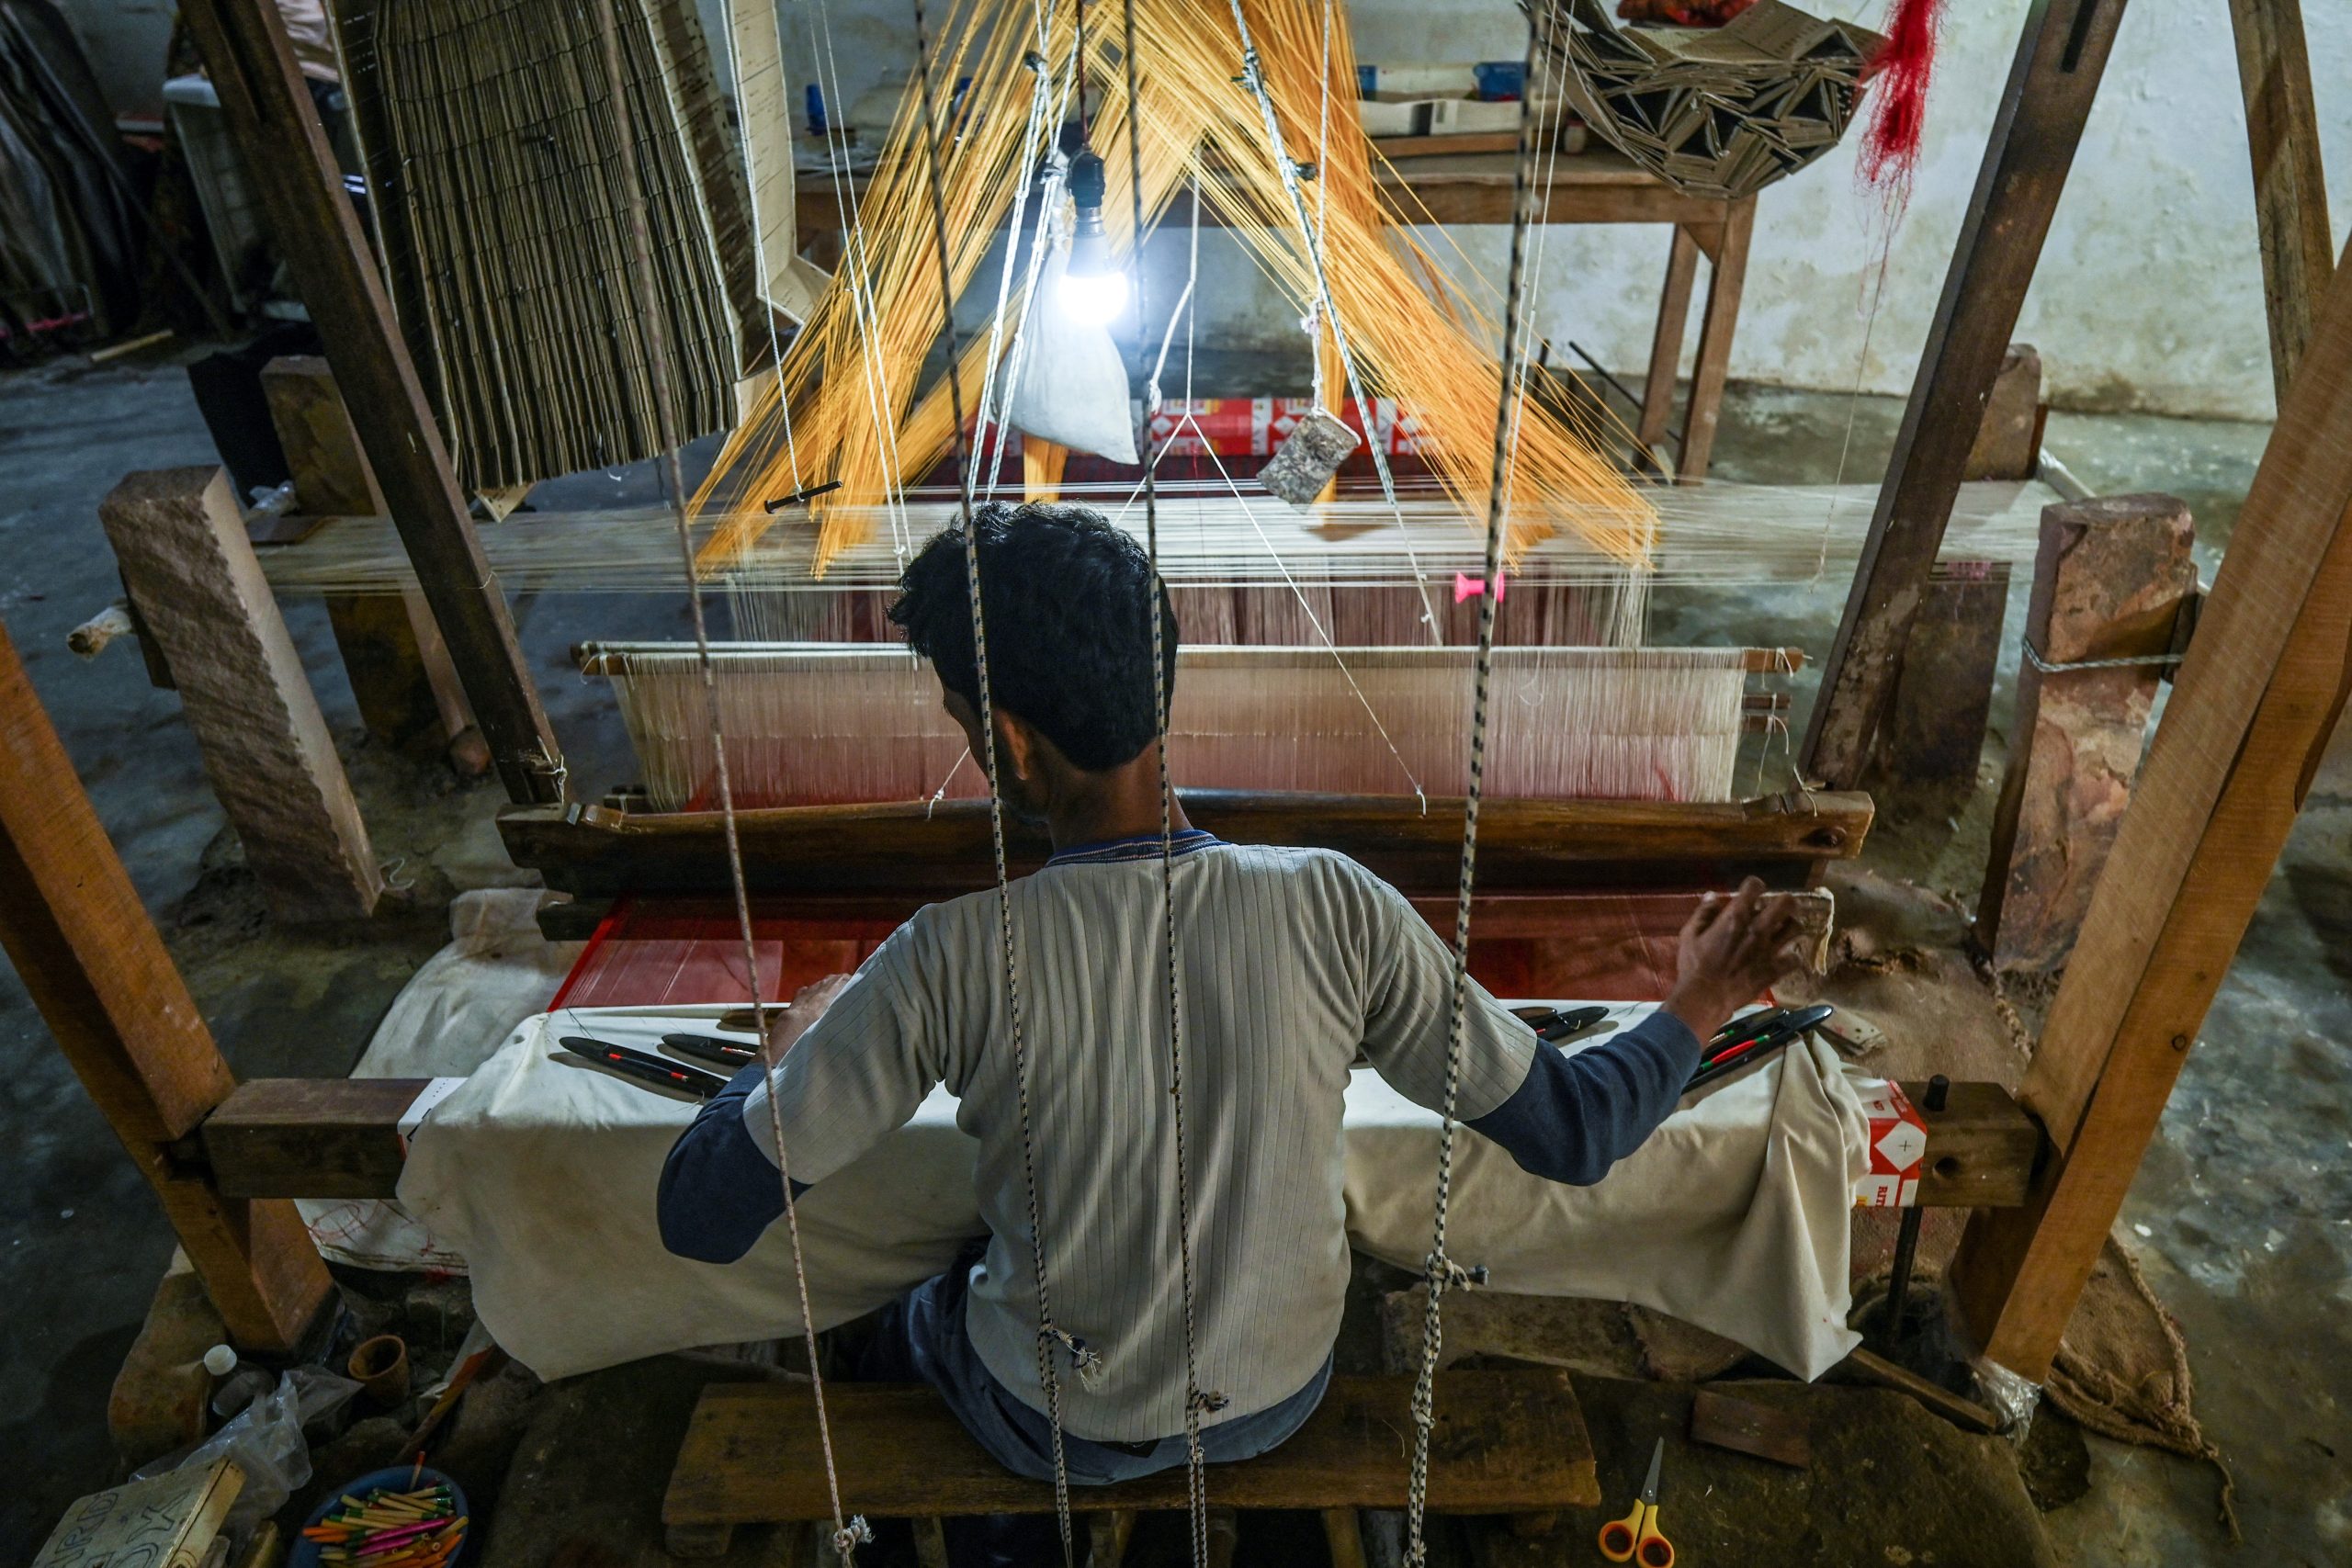
₹5,000 Cr/year (down from ₹7,000 Cr) · 200,000 weavers (halved from 4 lakh in a decade) · GI tag 2009. GST 2017, US tariffs in 2024, the Bangladesh export freeze — Banaras has taken every macro hit possible, yet every Indian wedding wardrobe still wants one (Scroll).
Source from Banaras if: you’re building a wedding/heritage brand and can do weaver-direct sourcing. The opportunity is the gap left by the Chowk middlemen — provenance proof, named weavers on the PDP, online distribution that bypasses wholesale.
3. Pochampally Saree Manufacturers + Gadwal — ₹1,000 Cr in Telangana
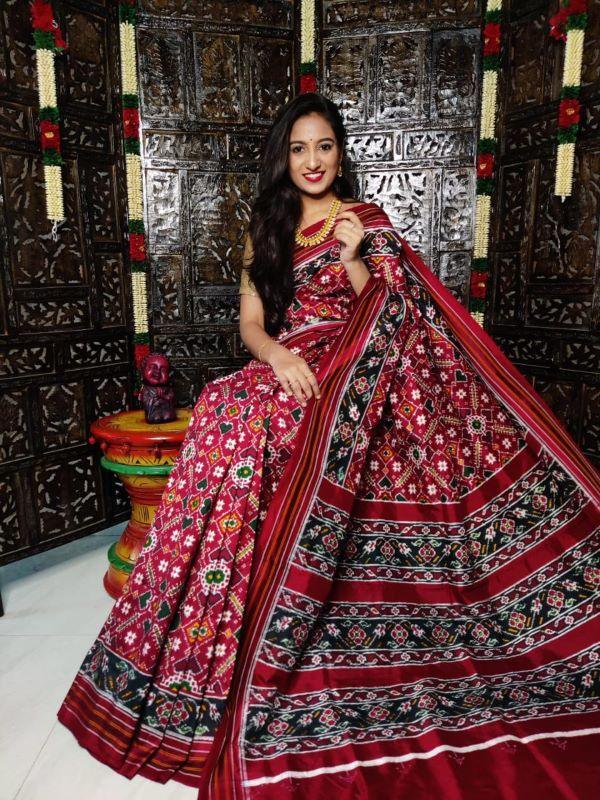
~₹1,000 Cr · 10,000 weaving families · Pochampally GI 2004–05, Gadwal GI 2010. Both are Telangana (state bifurcated 2014). The trap: only 800–1,200 GI-registered handlooms in Gadwal — ~80% of “Gadwal silk” sold online is power-loom imitation (Gadwal Weavers Society).
Source from here if: you’re building a premium ikat/silk brand. A real Gadwal weaver makes 4–5 sarees/month — if your store lists 200 SKUs and promises 7-day dispatch, you’re selling power-loom under a heritage name. Stock 30, pre-order the rest, name the weaver.
4. Mysore Silk Saree Manufacturer (KSIC) — ₹332 Cr, Demand Outstrips Supply
₹332 Cr KSIC turnover (FY24-25, up from ₹126 Cr in 2020-21) · 1,03,347 sarees/year · 789 in-house weavers · GI tag 2005. KSIC is the only legally authorised producer (Deccan Chronicle). The 4 AM queues outside KSIC outlets aren’t an exaggeration — production is structurally under-supplied.
Source from here if: you can negotiate a KSIC trade arrangement. Anyone selling “Mysore-style silk” online without it is selling a Bangalore weave with a hijacked name — the brand-trust cost is permanent.
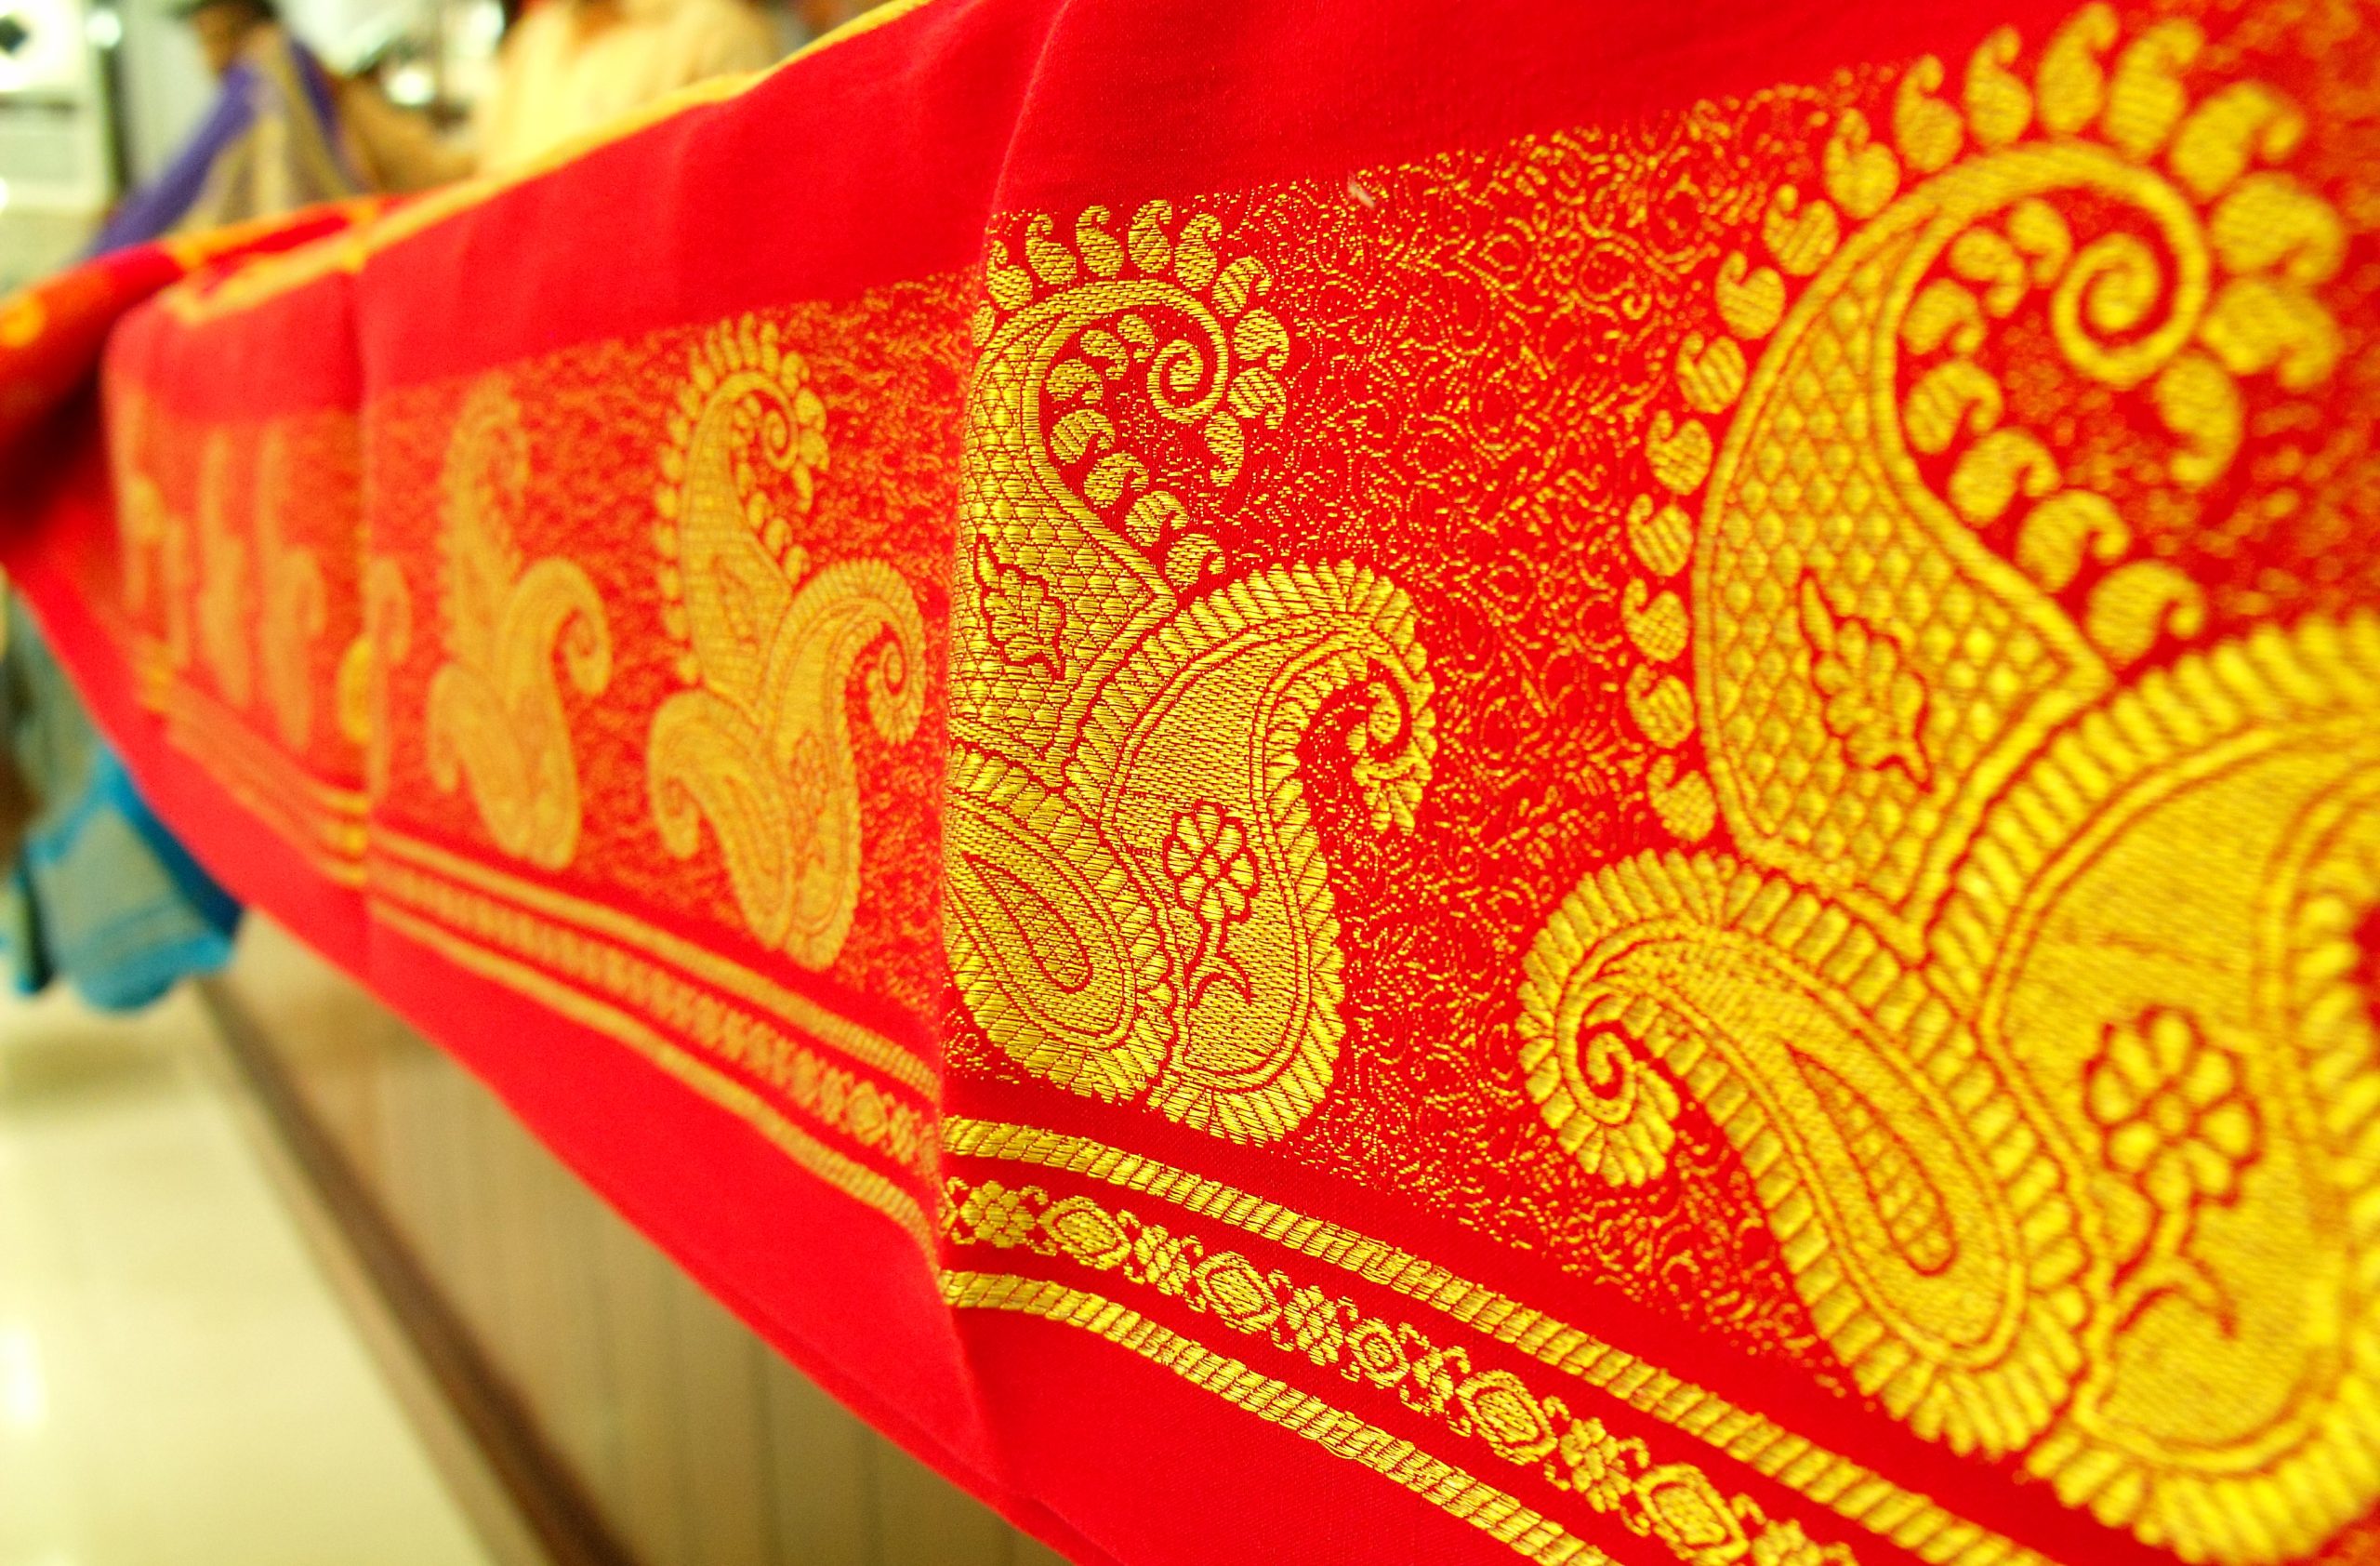
5. Kanchipuram Silk Saree Manufacturers — ₹200 Cr Co-ops, GI is the Moat
~₹200 Cr formal cooperative turnover · 50,000 weavers · 60,000 looms · 24 cooperative societies · GI tag 2005–06. The “₹10,000 Cr Kanchipuram market” you see online conflates retail across India (mostly Bangalore/Salem imitations) with the actual cluster (New Kerala).
Source from here if: you sell wedding silks at ₹40K+ AOV. GI authenticity is the pricing lever — customers pay 3–5× premium for verified GI over “Kanchi-style”. Build the proof into the PDP: weaver name, loom number, GI certificate.
6. Bengal Jamdani Saree Suppliers / Tangail — ₹150 Cr, GI Just Landed

Jamdani specifically: ~₹150 Cr · 5,000 weavers. Bengal handloom cluster (Phulia + Shantipur + Nabadwip): 125,000+ looms. Two facts to fix: Jamdani is a muslin/cotton hybrid, not pure cotton; and it’s traditionally a Dhaka craft — Bangladesh holds the original GI. Tangail Saree of Bengal got its GI on 2 Jan 2024 (Wikipedia).
Source from here if: you’re building a contemporary handloom brand. The GI on Tangail is brand-new — Bengal weavers are still pricing pre-recognition. There’s a 12–18 month window to lock capacity at the old rates.
7. Assam Silk Saree Manufacturers (Sualkuchi) — ₹100 Cr Cluster, ₹40 Cr in Muga
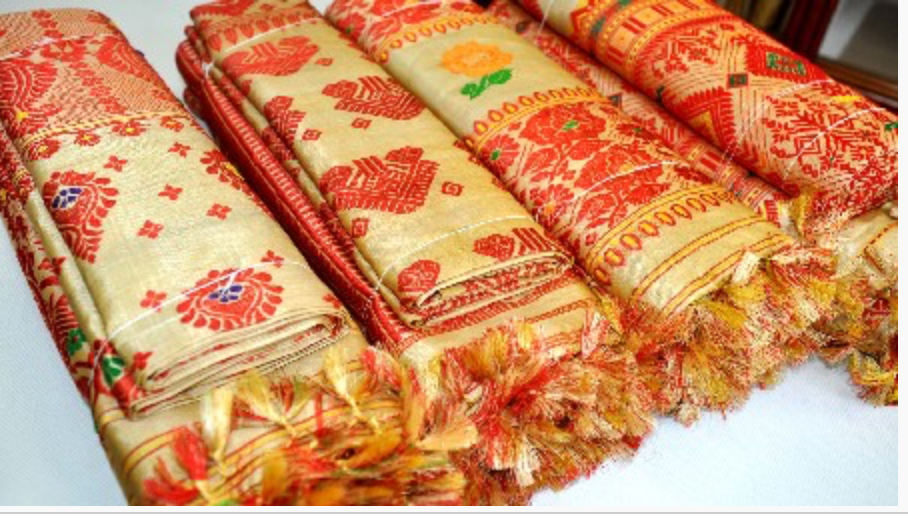
~₹100 Cr cluster · 50,000 livelihoods · 7,000 looms · 20,000 weavers · Muga GI 2007. Assam produces 95% of India’s muga silk and 65% of eri. Muga is the only naturally golden silk in the world — climate-stressed, increasingly positioned for global luxury (The Fourth Plate).
Source from here if: you sell premium ethnic at ₹15K+ AOV. Heads up: Mekhela Chador is a two-piece garment (mekhela + sador + blouse) — your Shopify variant structure has to handle the bundle, not three separate SKUs. Most stores get this wrong.
8. Yeola Paithani Saree Manufacturers — 35,000 Artisans, 6–18 Months Per Saree
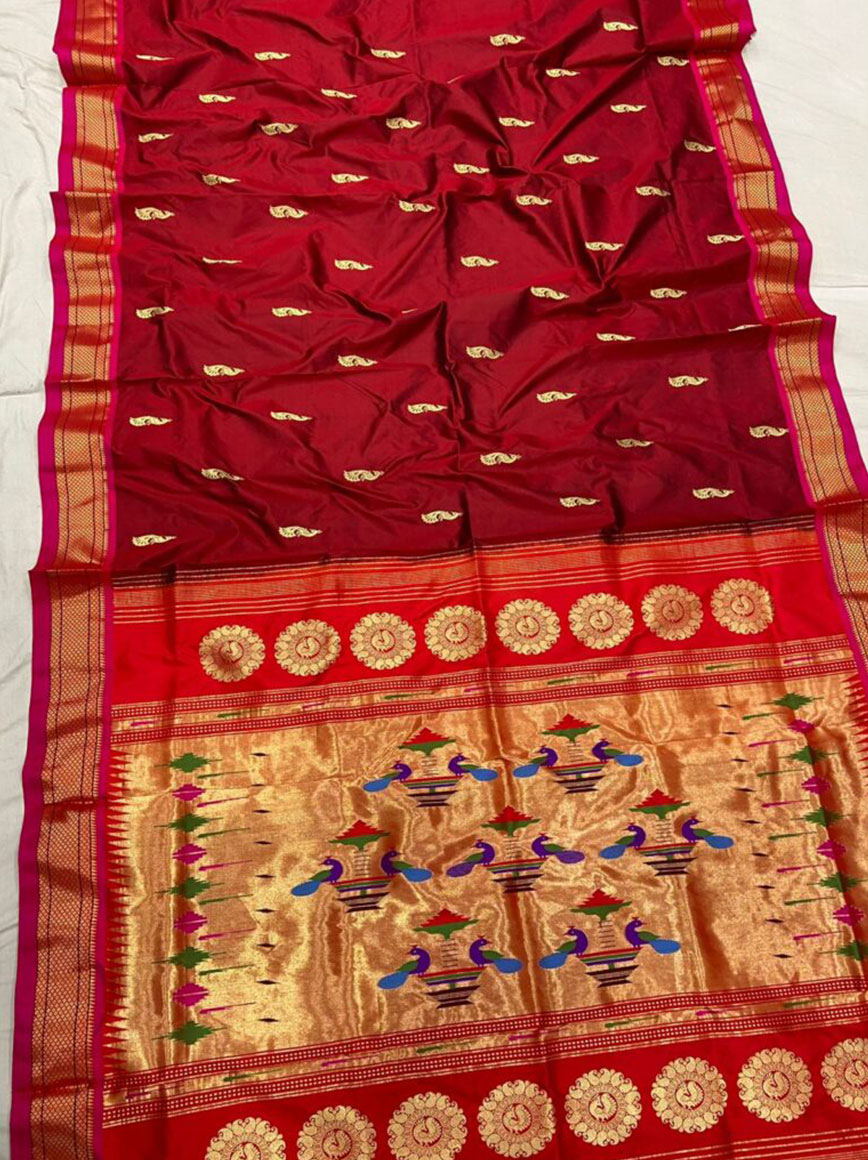
35,000+ artisans · 3,000 active looms · GI tag 2010. Maharashtra hasn’t published consolidated turnover, but the state just approved a ₹12.5 Cr Paithani tourism centre at Yeola and a common facility centre in July 2025 (30Stades).
Source from here if: you’re building a premium-only label at ₹40K–₹3L AOV. A genuine Paithani takes 6–18 months to weave. High margin per unit, low volume per month — plan inventory turns accordingly.
9. Sambalpuri Saree Suppliers (Odisha Ikat) — Under-explored, Weaver-direct Still Possible
No published cluster turnover. Balijori Haat in Bargarh is Asia’s largest open-air handloom market — “several crores of textiles change hands monthly”. A single Sambalpuri sari = 6+ weeks of work. Cotton retails ₹2K–₹40K; silk ₹12K–₹1L (30Stades).
Source from here if: you can put 18 months into weaver relationships before scaling. Boyanika (the state co-op), Priyadarshini Handloom and Utkalamrita are the only consolidated digital footprints. Whitespace.
10. Chanderi Saree Manufacturers — 11,000 Weavers, ₹15 Cr, Very Premium
~₹15 Cr · 3,600 active handlooms · 11,000 weavers · GI tag 2005 (India’s 4th GI product). Weaving is the primary income source for 60% of Chanderi’s population. The Padma Doree initiative (May 2026) is pairing ahimsa silk with Chanderi gold for global luxury (The Week) — a rare platform play that could 10× cluster economics in five years.
Source from here if: you’re building a contemporary craft / luxury crossover brand. Small cluster, premium positioning, almost no D2C competition yet.
The 10 clusters at a glance
| # | Cluster | Verified turnover | Weavers / looms | GI year |
|---|---|---|---|---|
| 1 | Surat | ~₹68,000 Cr cluster · ₹10,000 Cr exports | 1M+ power looms | — |
| 2 | Banaras | ~₹5,000 Cr | ~200,000 weavers | 2009 |
| 3 | Pochampally + Gadwal | ~₹1,000 Cr | 10,000 families | 2004–05 / 2010 |
| 4 | Mysore Silk (KSIC) | ₹332 Cr | 789 in-house | 2005 |
| 5 | Kanchipuram | ~₹200 Cr (co-ops) | 50,000 / 60,000 | 2005–06 |
| 6 | Bengal Jamdani | ~₹150 Cr | 5,000 weavers | Tangail 2024 |
| 7 | Sualkuchi (Assam) | ~₹100 Cr | 20,000 / 7,000 | Muga 2007 |
| 8 | Yeola Paithani | No public number | 35,000 artisans | 2010 |
| 9 | Sambalpuri | “Several Cr/month” | Major cluster | Yes |
| 10 | Chanderi | ~₹15 Cr | 11,000 / 3,600 | 2005 |
How to vet a saree supplier in 4 conversations
By WhatsApp, free, no commitment:
- First message — get the catalogue. Ask for the latest catalogue, MOQ, and starting price. Use the script in the next section. A good supplier replies within hours with photos or a video catalogue. Slow response = your customer’s RTO problem.
- Second message — get a sample. Ask for one or two pieces shipped at your cost. The fabric hand, finish quality, and packaging are non-negotiable. Anyone who refuses to ship samples at ₹500–₹2,000 is either flaky or has something to hide.
- Third conversation — ask about repeat orders. “If I order this design again in 30 days, can you produce 50 more pieces in the same quality?” The answer separates loom owners (yes, with timeline) from re-sellers (vague).
- Fourth conversation — agree on a single trial PO. ₹10K–₹25K for first order. If they deliver on time, with the agreed quality and quantity, scale. If not, walk away — there are 70,000 traders in Surat alone.
Your first WhatsApp message — copy-paste this
Hi [Supplier Name], Raghoo from GrowwwTech.com recommended you for
saree supply. Could you share your catalogue, MOQ, and pricing?
Thanks.
That single message gets you the three things you need to evaluate any supplier (catalogue, MOQ, pricing) in one round. The “Raghoo from GrowwwTech.com” line tells the supplier where you came from — they take it more seriously than a cold ping. The WhatsApp links in the supplier directory above are pre-populated with this script.
Common red flags
- No physical address. A real supplier has a Pan Bazar / Ring Road / Sahara Darwaza-type address. Online-only with no shop is a re-seller.
- “All sarees in stock, ship in 24 hours” for handloom. A real handloom weaver makes 4–5 pieces/month. 24-hour dispatch on Kanchipuram or Pochampally = power-loom imitation.
- No catalogue, just “DM for prices”. Wastes your time. Walk.
- Pressure to pay in full upfront. Standard term is 30–50% advance, balance on dispatch. Anyone demanding 100% upfront for a first order is either inexperienced or scamming.
- Refuses to ship a paid sample. Biggest red flag. Real suppliers send samples — they want repeat orders.
FAQ
Who are the top saree manufacturers in Surat?
Surat has 10,000+ saree manufacturing units across 240 textile markets — 70,000+ traders within a 20-km radius. Big organised names you’ll see ranking on directories: Vivera International, Kesaria Textile, Karishma Prints, Yasho Bhumi Textiles, Ajmera Fashion. Mid-market wholesalers we’ve worked with directly: Vasudha Agencies (synthetic, printed, festive — MOQ ₹5K–₹10K, contacts in the directory above). The “best” one depends on whether you want printed georgettes, fancy synthetics, or festival drops.
How do I find a wholesale saree supplier in India?
Four routes, ranked by reliability: (1) Vetted personal referrals like the directory at the top of this guide — fastest path to a real loom owner, not a re-seller. (2) Visit the cluster in person — Pan Bazar Secunderabad, Surat Ring Road, Varanasi Chowk all have wholesale rows. (3) IndiaMART / TradeIndia — high reach but you’ll spend weeks filtering re-sellers. (4) Trade exhibitions — IIGF, India International Garment Fair, Tex-Styles India. Use the 4-conversation vetting framework above before placing your first PO.
Is Surat or Banaras cheaper for saree sourcing?
Surat is dramatically cheaper for synthetic and printed sarees — wholesale starts ₹150–₹500/piece, retail ₹500–₹3,000. Banaras is more expensive but for handloom silk — wholesale ₹2,000–₹15,000/piece, retail ₹6,000–₹1L+. They’re not competitors on price; they’re different categories. If you’re sourcing for an Instagram boutique at ₹999 ASP, go Surat. If you’re building a wedding-wear brand at ₹15K AOV, go Banaras (or Kanchipuram for South Indian wedding markets).
Where is the biggest saree market in India?
Surat. ₹68,000 Cr saree-industry output, 10 million sarees per day, 70,000+ traders, 240 textile markets within a 20-km radius. Banaras leads handloom at ₹5,000 Cr. Kanchipuram leads silk wedding sarees. Pan Bazar in Secunderabad is the de facto wholesale hub for Telangana silks.
What is the size of the Indian saree market?
The formal retail saree market is USD 6.15 billion (~₹50,000 Cr) in 2025, projected to USD 10.77B by 2034 (IMARC). Add unorganised retail and exports and the full economy is well past ₹1 lakh crore.
Which sarees have a GI tag?
Major GI-tagged sarees: Banarasi (2009), Kanchipuram (2005–06), Pochampally Ikat (2004–05), Mysore Silk (2005), Chanderi (2005), Paithani (2010), Gadwal (2010), Muga / Mekhela Chador (2007), Tangail Saree of Bengal (2024). The GI is what protects the original cluster from power-loom imitations sold under the same name.
Which Indian state has the most saree weavers?
Per the Fourth All-India Handloom Census: 36 lakh weavers and allied workers nationally, 72% rural women. West Bengal, Assam, and Tamil Nadu lead by count.
What’s the typical MOQ for saree wholesale in India?
Synthetic Surat suppliers: ₹5K–₹10K worth per order is common (low entry). Premium handloom weavers: 1–10 pieces with 30-day pre-order. Multi-cluster wholesalers like Haneef Brothers (Telangana): ₹5K–₹10K per order with mixed lots.
Building a saree D2C brand on Shopify?
If you’re already running an ethnic-wear store and stalled at a ceiling — ₹10L/mo, ₹50L/mo, wherever — the leak is usually in the supply chain: paying middlemen too much, selling power-loom as handloom, or carrying 200 SKUs when the cluster can produce 30. The fix is rarely more ad spend.
We’ve built and scaled 200+ Shopify stores for Indian D2C brands — see what we ship for ethnic-wear founders. From ₹50,000, 4-week launch, fixed-price. No AMC, ever. Bug fixes for what we shipped stay included for the lifetime of the store.
30-minute call, no pitch — just a look at your PDPs, COD/RTO numbers, and supplier mix.
Sources
IMARC Group · Mordor Intelligence — India D2C · Shiprocket CargoX — Saree Exports · IBEF Handloom · PIB National Handloom Day 2025 · DD News — Silk Production · PM MITRA Park · Ajmera Fashion — Surat · Surat Updates 2025 · Scroll — Banaras · TwoCircles — Banarasi tariff hit · Fibre2Fashion — Pochampally · Deccan Chronicle — KSIC · 101Reporters — Sualkuchi · 30Stades — Yeola Paithani · 30Stades — Balijori Haat · IJCRT — Chanderi · The Week — Padma Doree